< Previous | Contents | Next >
![]()
Media Players of different types are accessed using tabs in the lower section of TriCaster’s Live Desktop.
![]()
![]()
The dominant feature of all of TriCaster’s Media Players is a storyboard-style playlist, used to organize content for use during live productions.

FIGURE 184
This arrangement offers easily visible thumbnail icons for each entry. A scrollbar at right accommodates long playlists when necessary.
Icons in the playlist can quickly and easily be re- ordered using the familiar drag and drop workflow. The playlist can even be altered during playback (of course, if the currently playing item is removed, playback stops immediately).
FIGURE 185
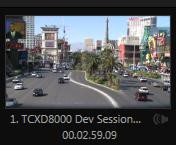
The filename (with extension) of each item in the current playlist is displayed above the thumbnails, and its duration is shown below.
Hint: The duration is the play time after trimming, and thus may be less than the file length on disk. In such cases, the In and Out markers on the Scrub Bar (spanning the width of the playlist immediately below it) show the effect of trimming operations, while the full width of the Scrub Bar depicts the total length of the file on disk.
Clicking an item selects it. The play position is automatically set to the In Point on selection. Standard Shift + click and Ctrl + click multi-selection operations are supported, and all selected items are denoted by a white border around their icon.
When a Media Player is stopped, its output to video monitors tracks selection and trimming operations. The current item is the Media Player’s output, and in consequence appears on monitors dedicated to the player, if any.
Of course, only one item can be displayed on output at a time; the frame surrounding the thumbnail icon for the currently displayed item is illuminated. Double-clicking a thumbnail (or clicking the Play button) begins playback from the In Point of the current file.
Hint: Double-clicking elsewhere in the playlist pane opens the Media Browser (hold down shift when clicking to open a system file explorer instead of the custom Media Browser).
Note that even still images and static title pages added to the playlist are given a play duration. The default duration for these items is fifteen seconds. This duration can be adjusted on an item by item basis (or as noted earlier, en masse for multi- selected stills or title pages).
During playback, the border around successive playlist items illuminates as each is played in turn. When necessary, the playlist pane scrolls to display the icon for the currently playing item. A progress bar is displayed beneath the currently playing thumbnail, and the Scrub-Bar knob also tracks playback progress.
Hint: Selection status is independent of which clip is playing. Selected items have a white border in the Playlist pane.
FILE OPERATIONS
![]()
Click the large + (Add Media) button beneath the playlist pane to open a custom Media Browser (see Section 11.2.2). Alternatively, double-click in an empty part of the Playlist pane.
Note: Add Media also supports compatible third-party asset management systems. Hold down the keyboard Ctrl key when clicking the + sign to access these tools.
Newly-added files become selected items in the Playlist pane.
Drag (appropriate type) file(s) from one module’s playlist to another module.
Right-click in the playlist pane to show a menu with context-relevant items from the following list (operations affect selected playlist items):
o Cut
o Copy
o Paste
o Remove
o Clone
o Display Name
o Set Audio Level (clips with sound and audio icons)
o Use Frame as Thumbnail
o Set Duration (Still image and title icons)
o Use Frame as Thumbnail
o Edit Title
o Add to Publish Queue – see Section 19.3.
o Send to > Buffer n (Still image and title icons – see Section 11.4)
Standard Cut, Copy, Paste and Delete keystrokes are supported for playlist entries.
![]()
Un-playable (missing, corrupt, or unsupported) file icons are dimmed.
Hint: Multi-selection is supported for most operations, including Set Duration (applies to Still and Title only).
DISPLAY NAME
Interestingly, the playlist Set Display Name feature edits a local alias, or ‘playlist nickname’. It does not actually change the name of the file on your hard drive. Roll the mouse over the icon display name to see the true filename.
AUDIO LEVEL
The playlist of the two DDRs and Sounds offer an additional audio feature:
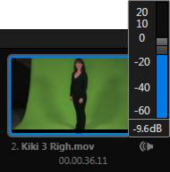
The icons of audio files (or clips with embedded audio) will display a small configure (gear) icon at lower right. Click this icon, or use the matching menu item (Set Audio Level), to pop up a small level slider (Figure 186).
USE FRAME AS THUMBNAIL
The first frame of a clip is seldom the ideal image to serve as its representative icon. Especially in sports, the first frame of many clips can be virtually indistinguishable from one another; the most distinctive visual often comes nearer the end of a highlight clip. Often too, clips may start out with black.
You can personally select the icon for each clip in the DDR by selecting Use Frame As Thumbnail. You can even select different icons for a single clip that is used more than once.
For added consistency and speed of selection, these personalized icons are also used in the Media Browser.
TRIMMING CLIPS AND THE SCRUB BAR
![]()
Just beneath the playlist pane is a full-width Scrub-Bar (Figure 187). The width of the scrub-bar represents the full run time of the current clip or other media file. Drag the knob left or right to change time position in the current playlist item.

Initially, In and Out Point handles at either end of the Scrub-Bar are at their extreme positions, marking the actual limits of the file on disk. Dragging the handles adjusts timing for the selected item (multi-selections are ignored for trimming).
During playback, the Scrub-Bar knob traverses the span between the In and Out Points. The duration (taking into account trimming operations) is displayed in a timecode field just to the left.
Hint: For longer durations, holding SHIFT while dragging scrub bar handles or the knob increases precision.
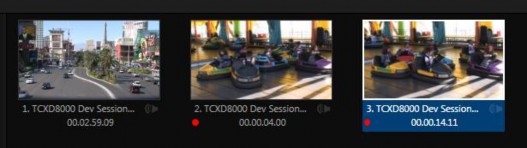
It’s useful to note that clips that are still being captured continue to ‘grow’ even after addition to a DDR playlist (see Section 11.2.2 and Section 20.2). These clips, featuring the red ‘recording’ overlay (Figure 188) can be freely extended beyond the bounds of the ‘in’ and ‘out’ points they were given when initially added.
ALPHA CHANNEL SUPPORT
![]()
For files with transparency such as 32bit image files, use non-premultiplied (or ‘straight’) alpha channels in TriCaster’s Media Players. Premultiplied files will not give the correct results when overlaid on other imagery.
Hint: Monitors can optionally show a checkerboard pattern behind transparent content.
![]()
![]()
11.2.2 MEDIA BROWSER
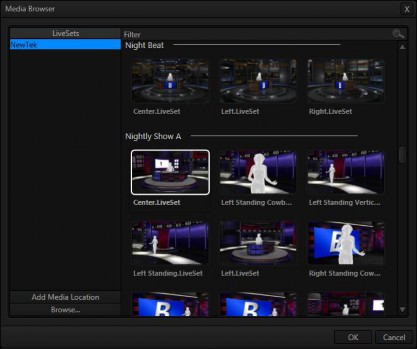
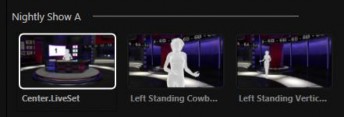
The custom Media Browser provides easy navigation to and selection of suitable content on your TriCaster or other NewTek live production system on the local network. The Media Browser appears anywhere in the Live Desktop that you might wish to select content, transitions or effects for use in your project (such as the Media Players, LiveSet and Transitions sections). Its layout is principally comprised of two panes at left and right that we’ll refer to as the Location List and File Pane.
LOCATION LIST
![]()
The Location List is a column of favorite “locations”, grouped under headings such as LiveSets, Clips, Titles, Stills, and so on. The Media Browser is context sensitive, so the headings shown are generally appropriate for the purpose for which they were opened. A list of sub-headings will appear under each main heading in the Location List. These may correspond to named sessions, or groups of content. When you select a sub-heading, the right hand pane – the File Pane – is populated.
SESSION RECORDINGS AND GRABS
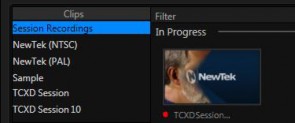
FIGURE 190
In addition to locations named for your stored sessions, the Location List includes two special entries worth noting. The Session Recordings location shows you all files captured in the current session, saving you time hunting through a hierarchy to find them. Similarly, Session Grabs makes it easy to find those still images you just snapped with TriCaster’s Grab feature.
Hint: Clips that are being actively captured are marked with a red ‘record’ overlay (Figure 191). These clips continue to ‘grow’, and can be re-trimmed after their addition to DDR playlists or the Publish Queue.
ADD MEDIA LOCATION & BROWSE
Clicking Browse opens a standard system file explorer, rather than the custom Media Browser.
Hint: To jump to the standard system file explorer (rather than the custom Media Browser) from a Media Player, hold keyboard Shift while clicking the Add button.
FILE PANE
![]()
Icons appearing in the File Pane represent content located inside the sub-heading selected at left in the Locations List. These are grouped under horizontal dividers named for sub-folders, which allows related content to be organized conveniently.
FILE FILTERS
The File Pane view is filtered to show only relevant content. For example, when selecting LiveSets, the browser only shows LiveSet files (.vsfx).
![]()
FIGURE 192
An additional filter appears above the File Pane. This filter quickly locates files matching criteria you enter, doing so even as you type. For example, if you enter “wav” into the filter field, the File Pane displays all content at the current location with that string as part of its filename. This would include any file with the extension “.wav” (WAVE audio file format), but also “wavingman.jpg” or “lightwave_render.avi”.
FILE CONTEXT MENU
![]()
Right-click on a file icon in the right-hand pane to show a menu providing Rename and Delete options. Be aware that Delete really does remove content from your hard drive. This menu is not shown if the item clicked is write-protected.
![]()
![]()
Transport controls and playback settings are located directly below the Playlist and
Scrub-Bar.
![]()
FIGURE 193
![]()
TIME DISPLAY
During playback, a timecode field beside the transport controls displays the Current Time for the player. This may be the current time position in the active playlist item (when Single mode is enabled), or relate to the duration of the entire playlist.
![]()
FIGURE 194
Left-click the field to type in a timecode, then press Enter to jump to that point in the file (or playlist).
If you right-click the timecode field instead, a menu allows you to choose to between showing current time and remaining time (Reverse Direction), enabling or disabling Warning Colors, or toggling Playlist Duration on and off (versus single playlist item duration).
Hint: With Warning Colors enabled, the time display provides visual indication that the playback is nearing its end. Ten seconds before the end of play for the current item, the digits in the time display turn amber. With only five seconds left, numbers are red.
SINGLE
![]()
Media Player playback normally conforms to typical playlist practice – each item in the playlist playing back in orderly succession.
FIGURE 195
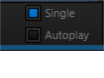
When Single mode is enabled, playback stops when the Out Point of the current playlist item is reached (unless Loop is also enabled, in which case playback of the current item repeats until manually interrupted).
TRANSPORT CONTROLS
![]()
A simple set of controls beneath the playlist pane provides all playback-related functions:
Previous button – go to previous playlist entry
Stop (clicking Stop when already stopped goes to the first frame)
Play
Next button – go to next playlist entry
(Not shown) – Double-click an entry in the playlist pane to begin playback at the start of that playlist entry
SPEED
![]()
The Speed control is only found in the DDR. The DDR supports variable speed playback between 25% and 400% of the normal rate (100%). Speed can even be adjusted during playback.
Note: Certain highly compressed video file formats cannot successfully be played back at rates beyond 200%, even though Speed value is set to a higher value.
Hint: Press Shift while double-clicking Speed to quickly reset to the 100% default.
As is common for numeric input controls in TriCaster, drag left or right to adjust the Speed value, or click the slider to access a direct entry field allowing you to type a value using the keyboard.
![]()
![]()
FIGURE 196
LOOP
Enabling Loop repeats playback continuously (respecting the Single
switch state).
AUTOPLAY
![]()
When enabled, the Autoplay switch has several important effects. First, it initiates playback automatically when the associated Media Player is placed on Program Out by a (Switcher) Take or Transition operation either directly (as a Switcher row
selection) or indirectly – such as by being displayed via an M/E channel or DSK
operation.
Second, if player output is displayed on Program the reverse Switcher transition occurs automatically as the end of play approaches, whether the Out Point of the current item for Single play or the end of the playlist. (This behavior is optional for M/Es – see Options in Section 14.2 and Section 7.1.)
Note: Unlike Switcher transitions, the DSK ‘out’ effect does not occur automatically as the end of play approaches.
In either case, when the Media Player is in Single mode, the current play position advances to the next item after playback is automatically stopped.
![]()
![]()
Another very useful feature of all TriCaster Media Players is the MEM Slot Bin, which provides quick and convenient access to stored playlists. As mentioned back in Section 4.9.1, MEM slots also store the state of various Media Player controls. To display the bin, roll the mouse pointer to the (nearest) side of the screen in a tabbed Media Player or the Audio tab (for Sound and Audio, MEM slots are presented on the left only).

When you change playlists by selecting another MEM slot, it’s almost as though you are accessing another Media Player. Use MEM slots for quick access to different categories of content for use during a live
presentation, playlists prepared for different clients, or for completely different programs you produce.
MEM slots can be named, and also display a small representative image (taken from the first entry in the playlist). As you move the mouse over a MEM slot icon it expands, providing an enlarged view of that playlist
item’s first frame. To populate a new MEM slot, simply click a blank icon.
FIGURE 197
To name a MEM slot, right-click it to open a context menu, and select Rename. Other menu options include Delete, Export and Import (the file will be saved with the extension ‘.pst’).
PREVIEWING MEM SLOTS
![]()
At times you may wish to preview the contents of a different Media Player MEM slot without disrupting playback of the current playlist. When a clip is playing, a small white ‘play indicator’ is shown over the icon for the currently selected entry in the flyout MEM slot bin. If you select a different MEM slot while the current clip continues to play, the playlist bin view updates, but the original item continues to play. The transport controls (Play, Stop, etc.) at the bottom of the tab remain
*dedicated to the active playlist – that is, the one actually playing, rather than the one currently being previewed in the tab.
To change to the previewed MEM slot immediately – ending playback and display of the current item – you can do so by any of the following means:
Double-click an icon in the previewed playlist.
Or press *Stop twice, and then Play (playback of the active item ends with the first Stop command; the second sets the playhead to the start of the current item in the new playlist).
* Normally, pressing Stop a second time when a clip is playing resets the playhead to the start frame in the same clip. The exception above occurs only when you are previewing the content of a different MEM slot during playback.
![]()
![]()
Default media file folders (Clips, Stills, etc.) are maintained for each session. This approach makes it easy to locate items using the Custom File Browser, and is also convenient for backup and other file management purposes.
The default media locations for the active session can be made accessible across your local network. Share Media Folders and Buffers in the File menu is on by default, and allows network clients to update media in the active session, even while live. The following session media locations are dynamically shared:
Audio
Clips
Stills
Titles

Buffers
Note:
Several
‘non-session
dependent’
locations in the main TriCaster application folder
are also shared. This allows applications such as NewTek’s Virtual Set Editor, etc., running on extneral systems to export directly to TriCaster. These network shares are unnaffected by the Share Media Folders and Buffers setting.
When suitable content is added to these shared folders, TriCaster’s Media Browser provides immediate access to it. Simply select the session name (under Clips, Stills, etc.) in the Location List at left to reveal the updated files in the File Pane at right.
Transferring very large files across a network can time consuming, and impacts both disk access and network resources.
When these resources are already heavily taxed, dropped frames on streaming or video outputs, or sluggish response to controls may result.
We strongly urge you to gather media assets before starting your live productions whenever possible.
This is wonderfully convenient, but should be approached with a measure of common sense. Network bandwidth has fixed
limits. Be judicious when transferring files while ‘live’. TriCaster may be using the network for many purposes – including streaming, or video feeds from a 3Play™, iVGA™, LiveText™ or third party software, as well as any unrelated traffic on the network.