< Previous | Contents | Next >
![]()
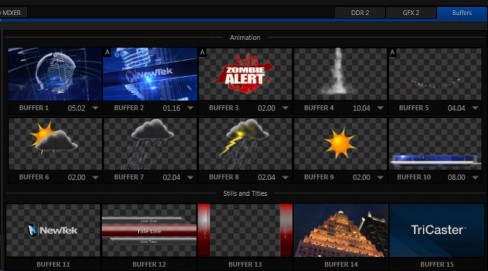
TriCaster’s powerful Buffer system provides convenient alternative graphics and animation sources for M/Es (including their associated Key channels), the Switcher’s primary Program and Preview rows, and its four DSK channels. The tabbed Buffers module (Figure 202) shows icons and controls for fifteen Buffers.
Buffers are sometimes even more useful than similar imagery supplied from Media Players. Buffers are retained in Switcher Memory for immediate recall and display. Using a buffer for a specific DSK or M/E channel (rather than a Media Player) eliminates the risk of accidentally displaying the wrong graphic, as might otherwise happen if the current Media Player item selection was not the one intended.
![]()
![]()
Buffers support the following media types:
Animation effects (TriCaster 460, 860 and 8000 only)
These are short duration full-motion video effects created in your favorite graphics or video applications and compiled using the add-on Animation Store Creator application.
o Looping effects – These animations play repeating endlessly, making them ideal for station ID ‘bugs’ and the like.
o Auto-run effects – These effects auto-run on display following a Take
or Auto. Playback runs once and then holds the last frame.
Graphics (all TriCaster models)
o Images – 24 bit or 32 bit (with embedded alpha channel) images.
o Title pages – editable TriCaster title pages, identical to those served up by the various Media Players.
Buffers tab item selection and display is controlled by a Buffer (BFR) button on main
Switcher source rows, M/E rows, and options in DSK and M/E Key source menus.
Hint: We considered a Buffer example back in Section 4.12.
For TriCaster 8000, the top ten buffer slots (or the top five, for TriCaster 460 and 860) support both compiled animation effects and graphics – still image files or TriCaster title pages. (Again, TriCaster 410 and TriCaster Mini do not offer animated buffers.)
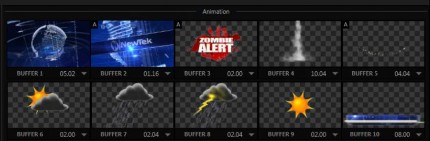
FIGURE 203
The remaining buffer slots are restricted to graphics content, including popular image formats along with TriCaster title pages (i.e., .cgxml files).

FIGURE 204
![]()
![]()
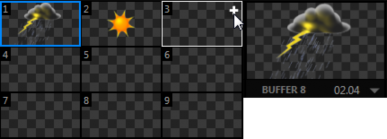
Clicking an icon reveals a palette of nine buffer presets (Figure 205). When you move the mouse over one of these icons a [+] (Add Media) button appears. Click this
+ sign to display the Media Browser, and then pick a suitable file to populate that buffer preset.
Alternatively, assign content to a buffer slot by following the steps below:
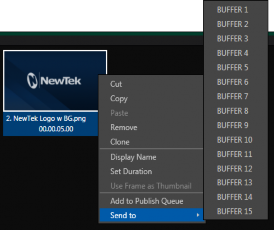
Right-click a still image or title page icon in a Media Player, and choose Send to from the playlist context menu.
Select a specific buffer you wish to assign the file to using the hierarchical menu.
Note that, in DDRs, this menu item only appears for still image formats and TriCaster title pages. Animation effects must be complied using the Animation Store Creator™ add-on
application before they can be loaded into buffers.
FIGURE 206
(Naturally, if an image or title has previously been previously assigned to the active preset for the designated buffer, the new file will replace the current one.)
Note: Generally, Buffers are linked to the original source file on disk. Having added a file to a buffer using the “Send to (Buffer x)” menu, it no longer matters whether the item continues to be available in a Media Player playlist. The buffer link will only fail if the original file is moved, or deleted from the hard drive - with one exception: editable title page buffers are fully independent of their original source files.
![]()
![]()
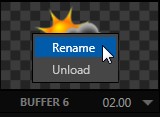
Right-click a thumbnail icon in the Buffers pane to open a menu offering two items:
FIGURE 207 | Rename allows you to assign a custom name to the buffer. The name will also be visible in menus (such as DSK source menus). The Unload option clears the effect, freeing Switcher Memory reserved for effects. |
Hint: A small [x] button appears over the upper-right corner on rolling the cursor into a Buffers tab icon. This button simply provides another convenient method of unloading an effect from Switcher Memory.
![]()
![]()
The thumbnail icon for a buffer with an animation effect assigned to it provides several additional features.
As mentioned earlier, animation effects can be of either looping or auto-run type (the type determination is made in the Animation Store Creator utility when the effect is generated).
Hint: Select a Slow, Medium or Fast preset value from the drop-down menu, drag the mouse left or right over the time to change the current value, or click to enter a number directly using the keyboard.
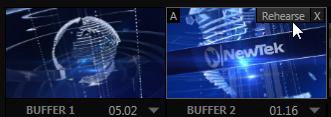
For auto-run animation effects, a further control is added to the thumbnail icon when you move the cursor over it. The Rehearse button appears just next to the [x] at upper-right (Figure 208). Clicking it plays the animation from its first frame through to the last, and holds that image.
Hint: In addition to providing a way to preview the effect (by displaying it on the Preview monitor, for example), Rehearse offers a handy way to re-run animated alerts and similar overlays at will. Remember, too, that the Macros feature provides a great deal of useful functionality in connection with Buffers and their display.
Still image Buffers have another very valuable ability, discussed next.
![]()
![]()
If you wish, you can share the Frame Buffer folder, which contains any still images used in Buffers, across a network. Share Media Folders and Buffers is easily enabled or disabled even during a live production using the File menu at the left-hand end of the Dashboard.
The files which serve individual still image buffers are located in clearly named sub- folders of the Frame Buffer folder for each session. These folders are arranged as follows:
Sessiondrive:\Sessions\sessionname\Frame Buffer\Buffer (#) e.g., D:\Sessions\MySession\Frame Buffer\Buffer 3
The top level Frame Buffer folder for the current session is accessible on the network when sharing is enabled. This allows still image buffers to be updated across a network using suitable graphics application (such as Photoshop®).
Note: This special share name assignment is dynamic. Network sharing is activated and the current Buffer path is automatically updated whenever you enter a session with the option enabled. This ensures that applications on networked systems can remotely access and update buffer graphics for the current TriCaster session.
![]()
![]()
The Frame Buffer folder is a “watch folder”. When you save an image into the correct location for a given buffer, the corresponding buffer immediately updates, even if it is currently displayed. This lets you refresh overlays virtually instantly from any computer on the same network.
Still image Buffers are normally stored using the popular 32 bit PNG (Portable Network Graphics) format, but other formats are also supported.
Specific filenames are not important in the buffer workflow. Actually, multiple media files with different names can reside in buffer folders. TriCaster always shows the ‘newest’ file – that is, the one with the most recent modification date.
![]()
![]()
Creative uses for buffers abound. You’ll notice that the sample media content supplied with your TriCaster includes a number of different styles of animated buffers – some full screen, suitable for looping backgrounds or similar applications; others that are suited to overlay, bug, or alert tasks.
Buffers of all sorts can be displayed in the following locations:
Main Switcher
o Program/Preview) rows – right-click the BFR button to select which buffer to assign to that button.
o DSK channels – choose a specific buffer using the DSK’s drop-down source menu.
M/E banks
o Mix mode – select a buffer for the A/B row BFR button just as you would for the main Switcher.
o Effect Mode – for multi-layer effects, the BFR button in each row can be assigned independently.
o Key channels – choose a buffer for any Key channel using its drop- down source menu.
Buffers allow abundant use of animation throughout your productions – as virtual set elements, layered graphics overlays, etc., all without tying up precious Media Players.
(Consider that, for TriCaster 8000, in addition to the buffer cross-points in the main Switcher, each M/E supports up to eight animated buffers. Since all of TriCaster 8000’s M/Es are re-entrant, layering possibilities are nearly endless.)
![]()
11.4.8 KEYING, PROC AMPS AND MORE
![]()
It’s worth noting that you can apply LiveMatte, Proc Amp and Edge (cropping and feathering) settings to individual buffers by assigning a desktop or Multiview monitor to the Buffer (or choosing a Workspace option that includes Buffers) and opening its Input Configuration panel. Of course you can also apply Position settings, including Rotation and Scale, in DSK, M/E and Key channels.
![]()
![]()
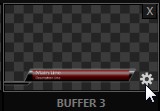
When a title page (.cgxml file) is loaded into a buffer, TriCaster’s live Edit Title panel (see Section 11.3) can be opened by clicking the gear icon that appears at lower- right when you move the mouse over the icon (Figure 209).
Changes made in this panel take effect immediately. If the buffer is displayed, the new title will appear as soon as your modifications are complete.