< Previous | Contents | Next >
SECTION 19.3 THE PUBLISH QUEUE
![]()
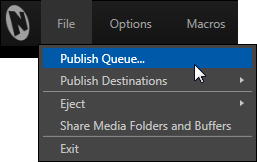
Having discussed configuration of publishing accounts, let’s move on to look at live operations. In the Dashboard’s File menu, select the Publish Queue … (Figure 311) to open the Publish Queue panel (Figure 312).
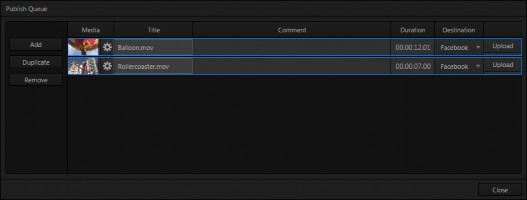
This is where you will create and manage the Publish Queue – that is, the list of clips and still images you wish to publish.
The features of the Publish Queue are easy to comprehend.
Click the Add button in the tool panel at left in this pane to open a Media Browser which you can use to select (and multi-select) content you wish to publish. You can choose items from your current session or another location.
Hint: You can Add and even Upload files that you are currently recording, even before pressing Stop. These files will be found in Clips/Capture folder for the current session.
The selected entries are subsequently listed in the queue pane at right. Related information is displayed, including the file name (or ‘alias’, in the case of files added from a Media Player playlist), Duration, and Destination (depending on settings, multiple entries pointed at different destinations may be added in one operation).
The Comment column allows you to add remarks that will be sent along with the upload to sites that support this. Click in this column to enable keyboard entry, or navigate to it and simply start typing. Press Enter or click elsewhere to end editing.
Editing the Title column entry in similar fashion affects uploads to social media accounts, but not FTP or File Copy operations. The Destination column provides a menu that allows you to choose between different publishing targets for the file.
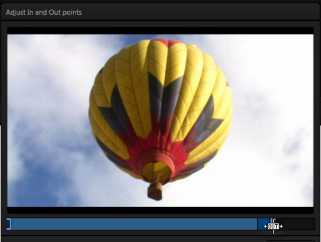
Click the gear icon at left in any row to open a trimmer (Figure 313) that allows you to adjust the in and out points for clips you plan to share (some file formats do not support trimming). Clips that are added while still being captured can be re- trimmed later to take advantage of file ‘growth’.
Hint: Select the Still Frame switch in the trimmer to select a frame and convert it to a JPEG image file on upload.
Note that you can even select publish destinations that have not yet been configured (Section 19.2), which allows you to queue up content, then later exit the Live Desktop, configure the credentials for the accounts (see Section 19.2) and – only then – upload the content.
Click in the Upload column to actually publish the file (note that multi-selection is supported; all selected files are uploaded in this case). The neighboring Status column tracks upload progress.
![]()
![]()
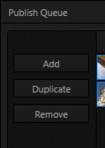
We touched on the Add button in the previous section. Two other nearby features help you manage your queue entries:
Duplicate clones selected entries, allowing you to quickly and easily create versions of the entries that can then be assigned to different social media accounts or target locations.
FIGURE 314
Remove, as you’d expect, deletes entries from the queue, doing so without any effect on the source files.
![]()
![]()
We considered setting up ‘accounts’ for publishing purposes back in
Section 19.2, it remains for us to determine what media types we want to send to which various (including FTP, File Copy, and social media sites).
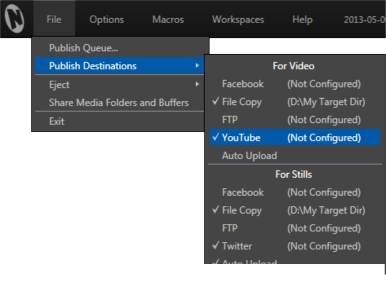
For example, it might be useful to send video clips to YouTube®, or to an FTP server, but still images to Twitter(R), or Facebook ®. The Publish Destinations item in TriCaster’s File menu (Figure 315) is where you configure these optional output targets.
Selecting this option opens a sub-menu showing two
lists. The first is titled For Video; while the second is labeled For Stills.
FIGURE 315
Adding a checkmark beside an account name in the Video list tells TriCaster that when you add a clip to the Publish Queue, it should create a queue entry with the corresponding destination.
Similarly, check-marking File Copy in the For Stills group will cause a matching entry to be added whenever a still image is sent to the queue.
Note: You aren’t forced to configure accounts beforehand. You can add media to the queue for un-configured destinations, and then supply the necessary account settings at a later time.
AUTO UPLOAD
![]()
Each group in this sub-menu – Video and Stills – has an additional checkmark-able option – Auto Upload. This allows you to determine when uploads to your configured accounts occur.
When Auto Upload is enabled, processing begins immediately after you add an item. Otherwise (left un-checked), you can perform uploads manually at a time of your choosing.
Hint: While it’s possible to process video uploads even as recording is underway, if there’s a lot going in your production you may find it preferable to upload stills on the fly and handle larger uploads afterward.
![]()
19.3.3 MORE ‘ADD TO QUEUE’ METHODS
![]()
Live production can demand your full attention. Spending time using Add in the Publish Queue panel could be a challenge. For this reason, TriCaster provides several quick and convenient sharing alternatives.
PUBLISHING ISOCORDER™ CLIPS
![]()
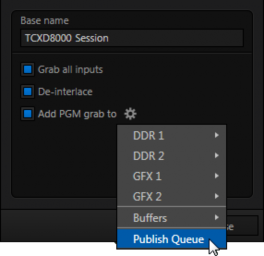
In the Record Configuration panel, the same menu Add to (Media Player) to menu used to send newly captured files to a Media Player playlist also offers an easy to use Publish Queue feature. Simply checkmark this item to add an entry to the Publish Queue each time you stop recording while capturing video.
Alternatively, press Shift while clicking the Dashboard RECORD button to immediately add the last five seconds to the Queue.
Hint: A TimeWarp™ control surface makes a perfect addition for sharing purposes. With Add to Publish Queue and Auto Upload enabled, an operator can easily mark and upload clips to social media sites on the fly, all without bothering the TriCaster operator.
SHARING GRABS
![]()
The Grab feature has a similar Add to menu, complete with Publish Queue feature, but naturally this operates on still images rather than clips.
You can use this to upload the image from Program output to multiple social media sites with a single push of the Grab button.
Hint: To add other angles from the same Grad, use the Add button in the Publish Queue; or add them directly from a Media Player they reside in, as discussed next.

SHARING MEDIA PLAYER CONTENT
![]()
Media Players also have a context menu item labeled Add to Publish Queue.
This sends selected items to the Queue, respecting the established (File menu) Publish Destination targets and Auto Upload settings.
(Just to mention it again, note that it is possible to select currently un-
FIGURE 316
configured Destinations. This lets you add entries to the queue, entering credentials for social media Accounts at a later time before uploading.)