< Previous | Contents | Next >
![]()
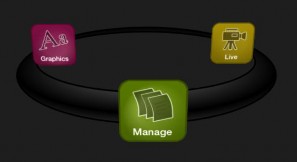
Opening a session from the Home Page (whether using Open or New) takes you to the Session Page, providing a new set of selections on the icon ring.
FIGURE 103
The name of the current session is shown in the top-left corner of the screen. The current session is displayed in the form “Home/session name”.
If you wish to leave the current session and return to the Home Page, you can click the large Back Arrow displayed beneath the session name, or the word “Home” in the session name label.
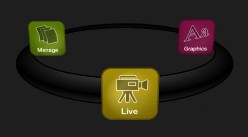
Initially, the icon ring in the Session Page offers three selections. These are discussed next.
![]()
![]()
5.3.1 LIVE
The icon labeled Live represents the Live Desktop, TriCaster’s live production center. Selecting it (by clicking the icon or using the left/right arrow keys to bring it to the front), presents a Start Live Production link in the Session Page’s right-hand pane; click this link to launch the Live Desktop.
![]()
![]()
TriCaster includes an integrated version of LiveText, NewTek’s standalone titling and CG application.
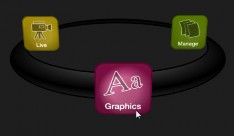
FIGURE 105
Selecting the Graphics icon displays a number of related items on the right-hand side of the Session Page.
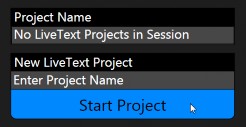
FIGURE 106
When you first enter a new session, no LiveText projects are listed in the area under Project Name. After you create one or more projects, the name(s) will appear here and, as you would expect, you can re-open the project by clicking its name.
Note: TriCaster stores new LiveText projects inside a folder named for the current session, as follows (for example):
D:\LIVETEXT PROJECTS\sessionname\projectname.cg.
LiveText’s internal File menu and Save As functions default to the same location. However, it is possible to use File>Save As to store a project in another location outside the session structure.
Be aware that projects stored outside the session structure are not shown in the project list on the Sessions Page. To re-open them, you’ll need to navigate to the project file using File>Open in LiveText.
Note: Similarly, external projects will not be backed up by the Backup Session function (or be deleted by the Delete Session function)
To create a new LiveText project, click in the default project name field (just above the Start New Project link) and modify it, then click Start New Project.
When you finish working in LiveText, click the [x] button in its upper-right corner (or select Exit in the File menu) to return to the Session Page.
![]()
![]()
5.3.3 MANAGE
Various TriCaster components provide filebins to permit you to manually administer files related to their projects, playlists, and so on. The Manage icon in the Session Page provides an alternative approach to file management.
At times you may find it useful to be able to quickly access the various files associated with specific sessions. Selecting Manage refreshes the options pane on the right-hand side of the Session Page with a number of convenient items.
BROWSE
![]()
Under the label Browse, you will see direct links to the Clips, Still, and other content associated with the current session. Clicking one of these links (or selecting it with the up/down arrow keys and pressing Enter) opens a system file explorer.
You can use the familiar features and shortcut keystrokes in these windows (Cut, Copy, Paste, Rename, Delete and so-on) to manage the session content.
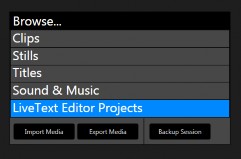
FIGURE 108
Hint: Of course, you can open several of these folders simultaneously, and navigate these file windows to other locations as well.
For example, you might copy the title page (.cgxml) files from the Titles folder of one session into the Titles folder of a different one before deleting the first session.
Several other important features are contained in the Manage group, including
Import Media, Export Media and Backup Session.
IMPORT MEDIA
![]()
We discussed importing media for using in TriCaster productions back in Section 4.2, so we’ll just review briefly here. Import Media’s quick processing makes this the fastest and most convenient way to pre-load a session with production assets.
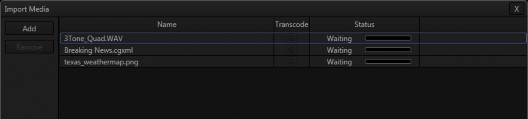
FIGURE 109
Clicking the Import Media link opens a custom import panel, offering batch import of files for use in TriCaster’s Media Players. It even allows you to transcode files to high quality TriCaster-friendly file formats at the same time if you wish.
Click Add to open a standard system file window, and select (or multi-select) items to build a list in the Import Media file pane. Some highly compressed video files may not be well suited to live playback. Enable switches in the Transcode column for files you wish to convert to a friendlier format on import. Files can be re-ordered by dragging their entries up or down with the mouse, or removed from the list by highlighting them and clicking Remove.
Once the batch import list is prepared, click Import to complete the operation. Files are processed quickly, and are automatically added to their proper locations (according to type) for easy access during live production.
Hint: Sections Section 4.2, 11.2.2, and A.4.2 discuss other aspects of media imports.
EXPORT MEDIA
![]()
The Export Media function allows you to create a list of video files for export, select a new file format for these exports to be converted to (on a per file basis), and designate where to send them. Clicking the Export Media button opens a new pane. Click the Add button at upper left to open a custom Media Browser (see Section
11.2.2 for browser details). Use this pane to locate and select (or multi-select) video clips for export.
Hint: The Export Media panel can be resized by dragging its edges or corners with the mouse.
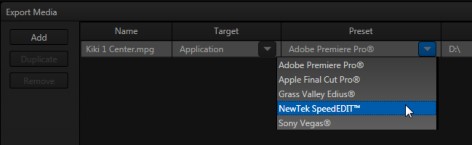
FIGURE 110
The file pane is much like a spreadsheet table, listing all files in the current export batch in its first column, then the current settings for each file in other columns. A Status column shows the current export status or progress for each file in the list.
TOOLS
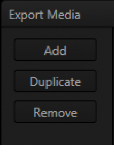
The Duplicate feature is very useful for cases when you wish to export content to multiple target file formats or locations, for different purposes or specific software applications.
Note that Export Media’s file list pane supports multi-selection. When a file (or group of files) is selected, you may use the Duplicate and Remove buttons to clone or delete files from the list.
FIGURE 111
Hint: To multi-select files, you can use the familiar Shift-click or Ctrl-click techniques.
TARGET, PRESET & DESTINATION
Having prepared the file list, click the triangle button in the Target field to open a drop-down menu listing categories of device or application targets to choose from. Then select a specific encoding Preset in the next column.
Export presets vary according to what is appropriate for the session and file format.
Note: When presets that do not natively support HD are selected during an HD session, output is automatically scaled as required to fit the selected file format. This is a convenience, but be sure to select a Preset suitable for your ultimate needs.
A similar Destination button opens a system file browser to let you designate (or create) a location for file output. Each file to be exported can have its own Target, Preset and Destination settings.
Hint: It is possible to selected mapped network locations with a ‘Drive letter’ assignment as the Destination, saving time later.
Export file format options are updated from time to time to include popular new formats. Here are some examples, as they appear for an HD session (the list is not all-inclusive, as modifications and additions are made from time to time).
Target categories are in bold text, while Presets are italicized:
Application (formats suitable for use with various popular NLE software)
o Apple Final Cut Pro® (.mov) – very high quality M-JPEG encoding, full raster, 4:2:2 sub-sampling, high compatibility.
AVI
o DV/ DVCPro (.avi) – moderate quality, SD only (NTSC 720x480, PAL 720x576), 25Mbit/s, 4:1:1 (NTSC) or 4:1:0 (PAL) sub-sampling, very broad compatibility.
o MJPEG (.avi) – moderate quality, SD or HD capable, 4:2:0 sub-sampling, broad compatibility.
DVD
o (x) (*.mpg) – SD-only MPEG 2, quality presets up to 9MB/sec bitrate (≈60 minutes) with 4:2:2 sub-sampling.
Flash/Flash 9
o A diverse collection of presets suitable for playback in newer or legacy Flash® players.
Mobile Devices
o Presets suitable for use with iPad®, iPhone® or iPod Touch®.
Quicktime
o Renderless Conversion – high quality ‘wrapped’ Quicktime® file.
o DV/DVCPro (.mov) – moderate quality, SD only (NTSC 720x480, PAL 720x576), 25Mbit/s, 4:1:1 (NTSC) or 4:1:0 (PAL) sub-sampling, very broad compatibility.
o h.264 Highest Quality (.mov)
o h.264 Very Good (.mov)
o MJPEG (.mov)
Same as Source – file copy (no re-rendering)
Video Server
o Leightronix NEXUS\Ultra NEXUS – SD (NTSC 720x480, PAL 720x576), high quality, MPEG2 Program Stream, 9Mb/s variable bitrate, 4:2:2.
o TelVUE Princeton – SD (NTSC 720x480, PAL 720x576), high quality MPEG2 Program Stream, 9Mb/s variable bitrate, 4:2:2, NTSC 720x480 (PAL 720x576).
Next, use the Destination field drop-down to designate a target folder for exported files to be sent. A progress gauge is shown during file processing. Click the Export button at the bottom of the dialogue to begin batch export processing.
Hint: The time an export takes is affected by numerous factors – the number, duration and resolution of the selected files, the speed of the device selected as target for the files, the designated format, and so on.
It is generally unwise to commence a file export shortly before a live event, since you cannot launch TriCaster’s Live Desktop during export. If necessary, you can cancel the current export operation.
BACKUP SESSION
![]()
Clicking the Backup Session button opens a system file explorer that you can use to assign a storage location for the backup files. Backup operations can take some time, depending on the amount of content in the session.
For obvious reasons, then, it would be wise not to begin a major backup operation shortly before a scheduled live production. A progress gauge is displayed during processing, and if necessary you may Cancel the operation. Of course, the session to be backed up is the current session (to back up a different session, return to the Home Page and Open a different session.
The backup operation feature will determine whether all media used in the session is local (i.e., located in folders named for that session), or whether some content is external – stored in other places on your system, and included in the session using Add Media Location, or from folders belonging to other sessions. If all session media is local the backup proceeds without further interruption.
When external media is used in the session, a dialog is presented stating "The following files are external to the session. Would you like to import these files?" The optional actions in the dialog are:
Backup without importing
Import and Backup
Cancel Backup