< Previous | Contents | Next >
![]()
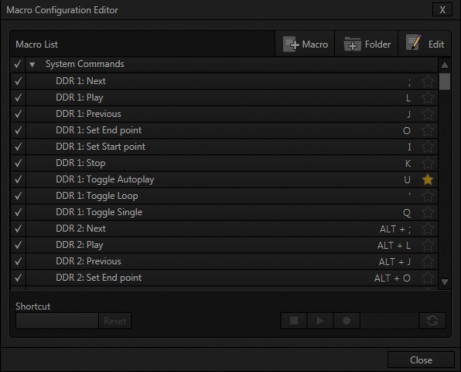
The largest part of the (resizable) Macro Configuration Editor consists of the Macro List. By default it will initially display a single line entry labeled System Commands.

FIGURE 285
System Commands are actually the very same shortcuts called by the user interface and Control Surface to operate your TriCaster. Expand this entry by clicking the triangle at left to see a long list of these important macros.
Hint: Notice that keystroke shortcuts for macro entries are shown at right, which is a convenient reference if nothing else.
It’s worth noting a few unique aspects of System Macros. First, System Macros are specially safeguarded within the system. Rename, Delete, Clone and Paste features are disabled, nor can you alter the order of entries in the list.
Also, be aware that un-checking the enable switch at left for the entire System Macros folder (or individual entries within it) will naturally result in the failure of all related keystroke shortcuts. By design, this does not affect Control Surface operations, however.
SECTION 17.2 RECORDING MACROS
![]()

Creating a new macro is simple. Buttons at upper right let you add folders and macros. Click the first to add a folder and name it. Selecting a folder in the list (other than the System Macros folder) enables the Add Macro button (Figure 286). Click this button to add a new macro entry.
![]()
Continue to define the macro by clicking the Record button at the bottom of the panel, and then just go ahead and perform the sequence of
operations you wish to include in the macro. You can use mouse, keyboard, and Control Surface operations when doing so.
FIGURE 287
When finished, click the Stop button to complete recording. Test the new macro by clicking the Play button. You’ll notice that an animated bar in the background of the macro’s entry in the list tracks playback progress.
Of course, you can modify the playback rate using the menu next to the Record
button. You can even set macros to loop using the button at extreme right.
SNAPSHOT MODE
![]()
One option in this menu bears explanation – Snapshot is rather special. When you choose Snapshot as the macro’s ‘speed’, you essentially force it jump to its end result. Any operation that is ultimately irrelevant in achieving that end result is simply omitted. Snapshot mode is very useful for macros that configure TriCaster to a particular state.
One example would be when you want to instantly reconfigure M/Es with different virtual sets for a scene change; or perhaps you want to quickly disable LiveMatte for all Media Players at once. The possibilities are endless.
Hint: You can record a macro that includes other macros. Depending on your order of operations, you may need to re-highlight the newly recorded macro in the list to show its Stop control (to end macro recording).